
Blog
The Rock Cycle Diagram and Beyond

Rock Cycle Diagram Struggles
I have to admit, as a middle school science teacher, the rock cycle diagram was always one of my least favorite topics to cover. While I have always loved teaching about volcanoes and plate tectonics, this topic seemed a little boring to me. The rock cycle diagram is so straightforward, how could I possibly make it fun?
It was never a struggle to find rock cycle diagrams, to display for my students. There are certainly plenty out there. I could have easily printed one up and discussed each aspect with my learners. I had plenty of examples of each rock type (igneous, sedimentary, and metamorphic) on hand in the classroom. My students always loved passing rock samples around the classroom.
When it came to actually reading the content, I was unable to find resources that would engage my learners. I needed something that would captivate them and keep them interested.
The Solution
Fast forward to comics. Once I began to create this rock cycle drawing, I knew it was something my students would love. By nature, comics and fun go hand-in-hand. Simply presenting the information in a comic-style format makes the lesson far more engaging and accessible. My students instantly light up when they are given a comic. The addition of a hands-on lab rounds out the lesson plan making it something students will always remember.
In this little blog entry, I will explain the important aspects of the rock cycle and how I teach it in my own classroom. I will explain everything from the content to the rock cycle project. Hopefully, it helps you improve your own rock cycle lesson plan and inspires your students to dive deeper.
I will be referring to the Rock Cycle Lesson Plan available here and on Teachers Pay Teachers (Get it here and save $$$).
The Content
The rock cycle is a process that describes the formation, alteration, and erosion of rocks over time. It is a continuous process that is driven by various geological forces, including heat, pressure, weathering, and erosion.
Types of Rocks
Igneous rocks form from the cooling and solidification of magma or lava. They can be further classified into two categories: intrusive (formed below the earth’s surface) and extrusive (formed above the earth’s surface).
Sedimentary rocks form from the accumulation and compression of sediment, such as sand, mud, and small rocks. They can be further classified based on the sedimentary process that formed them.
Metamorphic rocks form from the alteration of existing rocks due to heat, pressure, and chemical processes. They are formed deep within the earth’s crust and can be classified based on the type of parent rock and the metamorphic conditions that occurred.
The rock cycle is constantly in motion and the different rock types can change into one another through various processes such as erosion, weathering, heat, and pressure. Erosion and weathering break down and wear away rocks, and tectonic activity can raise rock formations and expose them to the surface. This process continues and creates a continuous cycle.
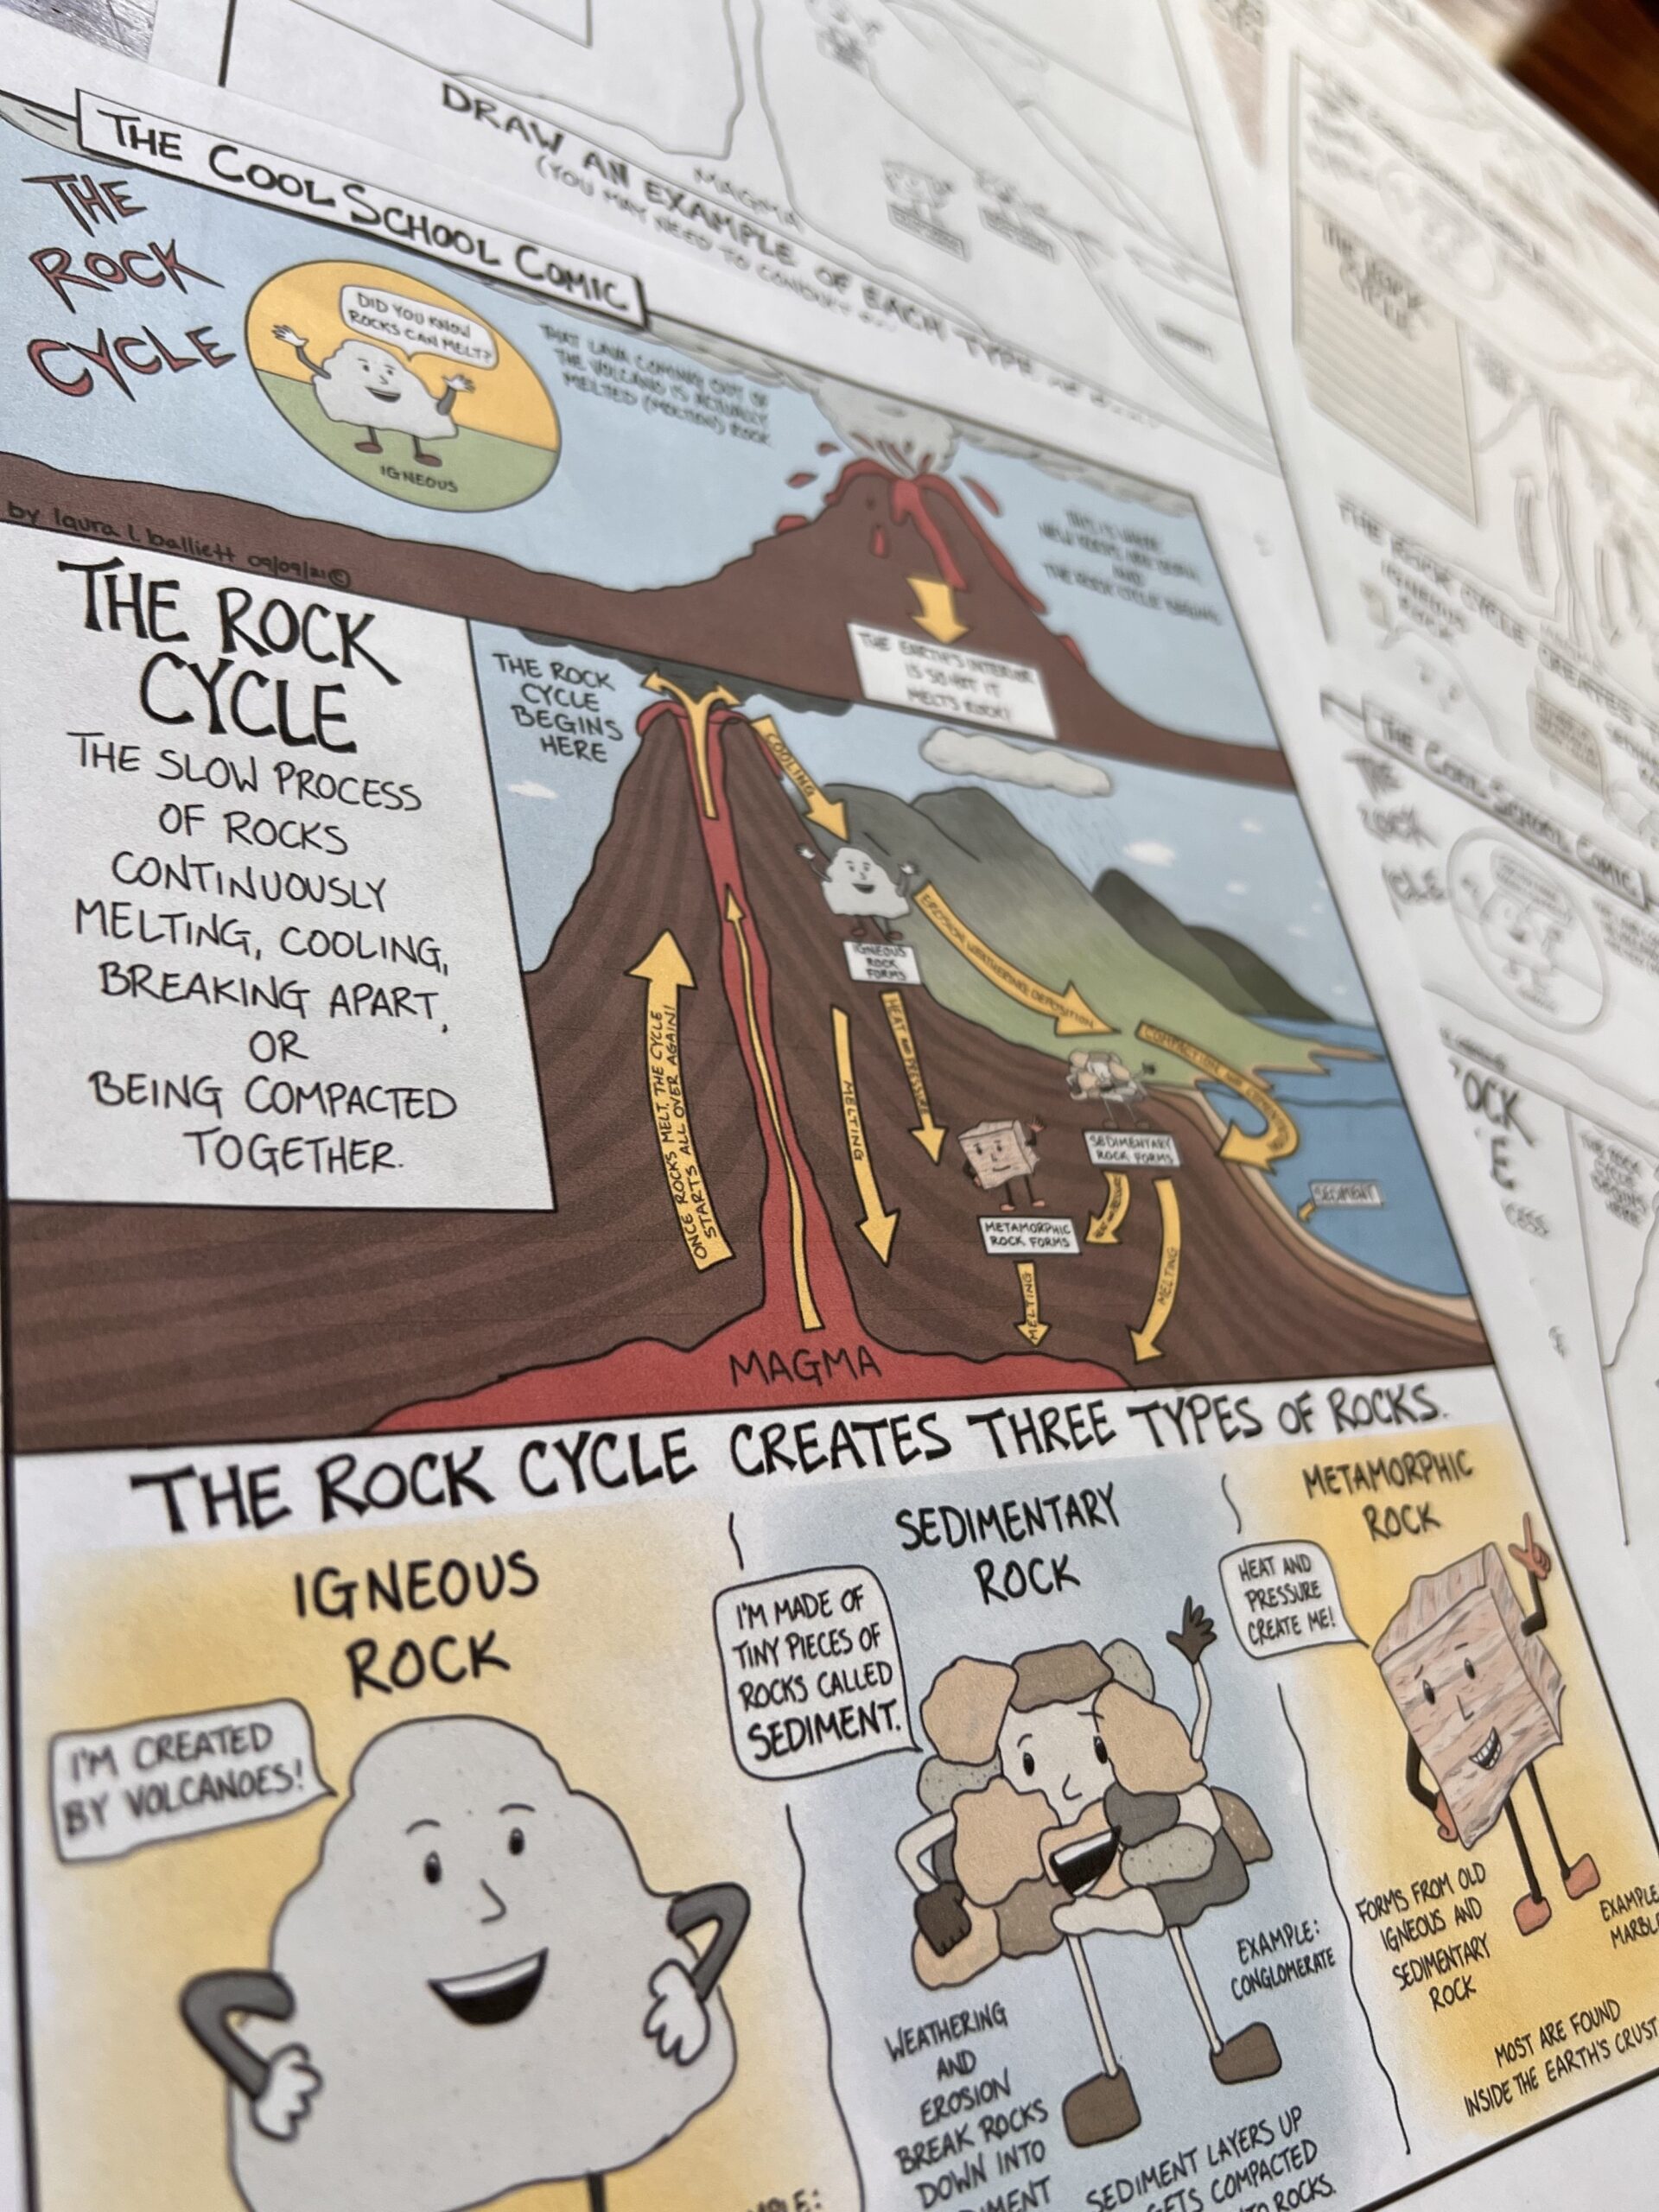
The Content Comic
This comic depicts the rock cycle diagram in a kid-friendly manner. This rock cycle drawing makes the information more approachable and less intimidating to struggling readers. I like to tie this comic with the Doodle Notes and the slideshow.
As I discuss the information with my learners, I answer questions such as-
Which type of rock is created when lava cools and hardens? What type of rock is formed by heat and pressure? How does sedimentary rock become an igneous rock?
Most of the time, I present the information using the animated Google slideshow prior to giving my students the comic. This way, they cannot jump ahead too much or get distracted while I am teaching the content. After I fully explain the different parts of the rock cycle diagram, I hand out the science comic.


Hands-on Rock Cycle Activity
Once the content is covered, it is time to begin the active learning process. Here is where the lesson gets even more fun!
As with all of my hands-on activities, the directions are presented in both a visual and written format. I do this because it has been my experience that a large number of students do not read directions. Providing them with images encourages learners to explore and read each step.
This lab is low-cost and low-prep. It involves a bag of Starbursts, wax paper, aluminum foil, and a heating surface. Students follow the steps presented in the comic as they create each type of rock in the rock cycle.
Once each rock is created. They need to complete the follow-up lab sheet. This final step in the activity requires students to physically place each representation of the rocks into the proper position in the rock cycle diagram. The lesson plan I created gives you the option of using a lab sheet with all of the arrows filled in or blank.

Rock Cycle Project
The final aspect of this lesson is a rock cycle project. This project allows students to demonstrate their understanding with a little rock cycle drawing and give students the opportunity to create their own rock cycle comic.
In this project, students are required to teach a reader about the rock cycle by creating a comic. They can pick a specific aspect of the rock cycle such as deposition, rock cycle steps, or how metamorphic rock forms.
Each template contains the rows for the comic, and students are encouraged to draw in the vertical lines wherever they need them. This allows flexibility in the creation process.
The project is designed to take several class periods to complete and comes with two rubrics to differentiate the learning. The basic rubric lists simplified requirements, and the advanced rubric specifically addresses vocabulary and content requirements.
Here are a few other rock cycle project ideas-
- Creating a rock cycle diagram: This could involve researching and illustrating the different types of rocks and the processes that change one rock type into another.
- Building a rock cycle model: This could involve using materials such as clay, plaster, or modeling clay to create models of different types of rocks and the processes that change them.
- Conducting experiments: This could involve conducting experiments to simulate the formation of different types of rocks or the processes that change them. For example, students could experiment with the effects of heat and pressure on different types of rocks.
- Research paper: A research paper on a specific aspect of the rock cycle, such as a specific rock type or process, can be a good way to dive deeper into the topic and learn more about the science behind the rock cycle.
These are just a few examples of how to approach a rock cycle project, and you can adapt the project to best suit the needs of your students.

How to Get Your Hands on This Innovative Learning Tool
- The Cool School Comic Shop
- All of my lesson plans include a slideshow, content, Doodle Notes, hands-on learning, projects, follow-up activities, and more. CLICK HERE
- YouTube
- I am also developing a YouTube channel to incorporate a video component into each package. CLICK HERE
- Teachers Pay Teachers
- Due to the fact that TPT takes a cut of my earnings, products are priced slightly higher. At the moment, there are more products available on TPT. I am working to get them all added to this page. CLICK HERE
- Subscribe
- Sign up for the Cool School Comic newsletter and be the first to hear about sales and new products. I send emails about once a month. CLICK HERE